Ready to Elevate Your Comfort?

Call 707.284.1039 Today!

Schedule Appointment

What Is the Average Cost of Mini Split Installation in Cotati, CA?

The average cost of mini split installation in Cotati, CA is typically between $2,500 and $7,000, depending on the size of the system and installation complexity.


If your home’s atmosphere feels off, you’re not the only one sensing the shift. The discomfort of sleepless nights and torrid afternoons makes a Mini Split system a necessity. But how can you obtain this multifunctional solution that cools and heats your household equally well? The logical first question you’re asking yourself is, “What is the average cost of Mini Split installation in Cotati, CA?So, let’s determine what you can expect to pay for this service and why it’s a worthy investment for your comfort and energy savings.

Understanding What Mini Split Systems Are

A mini split is a heating and cooling system designed to let you manage the temperature in specific rooms or areas independently. They operate without air ducts, and that’s what makes them an ideal solution for homes lacking existing duct systems or for newly added rooms. They consist of an outdoor unit and one or more indoor units connected by a conduit.

How to Make Your Mini Split System Last Longer

Proper maintenance of your mini-split system is essential to ensure its longevity and efficient operation. By following these professional tips, you can maximize the lifespan of your system and avoid the inconvenience and expense of premature replacement:

  • Regular Filter Cleaning –Clean the filters every 2-4 weeks to maintain optimal airflow and system efficiency. Unclean filters will severely strain the mini-split.
  • Inspect for Refrigerant Leaks  – Periodically check refrigerant lines for any signs of leaks. Low refrigerant levels can cause the system to overheat, leading to failure.
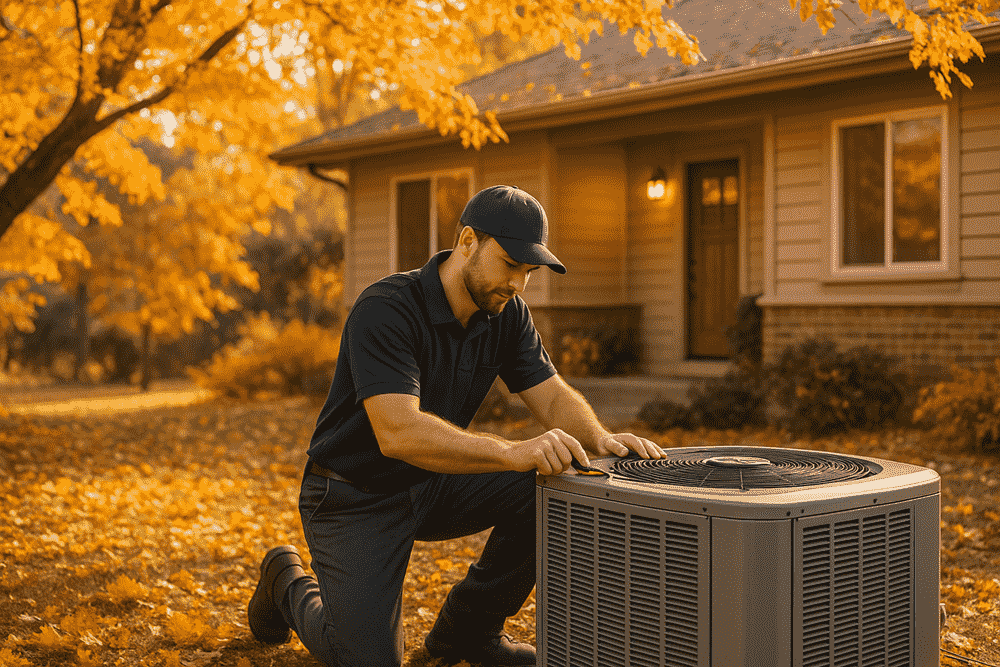
  • Maintain a Clear Outdoor Unit   – Make sure that the outdoor unit doesn’t contain debris. Obstructions can block airflow, causing the system to overheat and reducing its efficiency.
  • Monitor and Optimize Usage – Avoid overworking your system by setting reasonable temperature levels. Consistently using extreme settings can accelerate wear and tear, shortening the system’s lifespan.
  • Ensure Proper Installation – Verify that your system was installed correctly, with appropriate insulation and placement. Poor installation can cause unnecessary strain on the system, leading to inefficiencies and potential damage.
  • Check Electrical Connections  – Regularly inspect the system’s electrical connections for any signs of wear or looseness. Faulty connections can lead to system malfunctions or even damage to the electrical components.
  • Install a Surge Protector – Protect your system from power surges by installing a surge protector. This precaution helps prevent electrical damage during storms or sudden power fluctuations.

Factors Affecting Mini Split Installation Costs in Cotati

When calculating the expense of installing a mini-split system, you need to consider various factors. Being aware of these aspects can assist you in planning and budgeting for your installation properly.

Quantity of Zones

Expenses increase as you add more zones or areas to control since each one needs a separate indoor unit. System Capacity: The required system size is based on the total area you intend to cool, with larger systems leading to greater costs.

Installation Complexity

If your home has easy access for the installation team, the job will be simpler and less expensive. However, if your installation requires extensive work, such as running conduits through multiple floors or dealing with unusual layouts, the cost will go up.

Make and Model

Premium brands with sophisticated features tend to have a higher price tag. Getting an older model might save money, but you could be sacrificing the newest innovations and upgraded performance. 

SEER Value

The Seasonal Energy Efficiency gauges the system’s performance. Systems with elevated SEER values offer greater efficiency, typically leading to a higher initial price but reduced operating expenses over time.

Labor Costs

They are determined by the chosen professional contractor and the nature of the task. In Cotati, experienced contractors who specialize in mini split systems might charge more, but their expertise could save you money in the long run by avoiding potential issues.

Breakdown of Mini Split Installation Costs in Cotati

To give you a clearer picture, let’s break down the typical costs associated with mini split installation in Cotati, CA:

Single-Zone Systems 

For a single-zone system (cooling one room), you can expect to pay between $2,000 and $6,000. This includes the cost of the unit itself, which typically ranges from $1,000 to $3,500, plus installation costs, which can range from $1,000 to $2,500.

Multi-Zone Systems

If you’re looking to cool multiple rooms, a multi-zone system might be more appropriate. These systems range from $3,000 to $10,000 or more, depending on the number of zones and the complexity of the installation. The cost of each additional indoor unit typically ranges from $500 to $2,000.

High-End Systems

For larger homes or those looking for premium features like Wi-Fi connectivity, advanced filtration, or ultra-quiet operation, high-end mini split systems can cost upwards of $12,000 or more.

Additional Costs

Don’t forget to factor in potential additional costs such as electrical upgrades (if your home’s electrical system needs updating to accommodate the new unit), mounting hardware, or extended warranties.

Is a Mini Split System a Wise Choice?

With the associated costs, you might be contemplating whether a mini-split system is a good investment. Here are some benefits that could help justify the expense:


  • Energy Savings: The upfront cost of a mini-split system might be higher than other options, but the energy savings over time can be significant. Many homeowners find that their energy bills decrease substantially after installing a mini split, especially if they previously relied on window units or inefficient central systems.
  • Comfort: If you ask us, the number one perk is the comfort that a mini-split system provides. By maintaining exact temperature settings, you can guarantee comfort in every area.
  • Long-Term Reliability: Mini-split systems are durable and long-lasting, especially if you know how to keep them. Mastering the upkeep of these units will pay off in consistent performance and extended system life.
  • Reduced Installation Expenses: The simplicity of installation reduces labor costs, making the initial investment more manageable, especially if you’re upgrading from window units or space heaters.
  • They’re Good for the Environment: These systems utilize cutting-edge technology that minimizes energy use and decreases greenhouse gas output. Choosing a mini-split system is an environmentally conscious decision, aligning with the growing trend toward sustainable living, which adds value beyond just financial savings.
  • Quiet Operation for Better Living: Mini-split systems operate with minimal noise and provide a peaceful indoor environment. This quiet performance is especially valuable in bedrooms or home offices, as it enhances your overall living experience and makes the investment worthwhile for a more serene home atmosphere.

Finding the Right Contractor in Cotati

Choosing the right contractor is crucial to the success of your mini-split installation, so here’s how to make it right:


  • Experience: Look for a contractor with experience installing mini split systems, particularly in homes similar to yours.
  • Credibility: Review online feedback and request references. A contractor known for excellent workmanship and an outstanding support team can only handle the task swiftly. 
  • Licensing and Insurance: Don’t hire uninsured contractors or ones without a license. Doing so puts you at a serious threat of liability issues and poor workmanship. 
  • Detailed Estimate: To prevent surprises in the future, ask for a detailed estimate that includes all costs—labor, materials, permits, etc. 
  • Warranty: If a contractor doesn’t offer a warranty, that is a clear red flag. A solid warranty reflects the contractor’s confidence in their work, assuring you that any concerns will be resolved. 
  • Local Expertise: Choose a contractor who knows Cotati’s building codes and climate. This ensures your system is installed correctly for local conditions.
  • Ongoing Support: Find a contractor who offers maintenance services after installation. That’s how you keep your system running efficiently for many years.

DIY Installation: Is It an Option?

Some residents might contemplate installing a mini-split system on their own to cut down on labor expenses. Although it’s feasible, it’s typically not advisable, unless you possess extensive experience with these systems. Here’s why:


  • Complexity- Installing a mini-split system requires specific knowledge and tools. Poor installation can cause underperformance, leaking, and system failure.
  • Safety- Handling refrigerants and electrical components can be dangerous if not done correctly. Exposure to them can pose serious health risks, leading to expensive medical bills and potential long-term health issues.
  • Time and Effort-  Even if you’re comfortable with the technical aspects, installing a mini-split system is tiring and time-consuming.
  • Hidden Issues – A professional can identify potential issues, like structural limitations or optimal placement, that might be overlooked in a DIY installation. Missing these details can lead to long-term inefficiencies or costly adjustments later.

Beat the Heat with Comfort You Can Count On

For residents of Cotati, CA, investing in a mini-split system means more than just beating the heat. It’s about enhancing your home’s comfort and value. Whether you’re cooling a single room or your entire home, mini splits offer a flexible solution that can be tailored to your needs.

Why wait to feel the difference a mini-split system can make in your home? Our expert team is just a call away, ready to offer you a free consultation and estimate. We’ll help you find the perfect mini-split system and ensure it’s installed with expert precision so the temperature feels just right. Stay cool, comfortable, and stress-free all year long. Contact Elevated Comfort today, and let’s make it happen!

Q&A

Will there be any added expenses I should know about?

Beyond the base installation fee, you might encounter additional costs such as electrical upgrades, permit fees, or potential wall modifications. 

Can I decrease the expense of my mini split installation?

Of course! Look for seasonal promotions, compare quotes from multiple contractors, and consider DIY options for simpler parts of the installation. 

What tells me that I should get another mini split system?

If you notice uneven temperatures, frequent breakdowns, or skyrocketing energy bills, it’s a sign your mini split system might need replacing. Also, outdated units or excessive noise can indicate it’s time for a new installation to enhance efficiency and comfort.

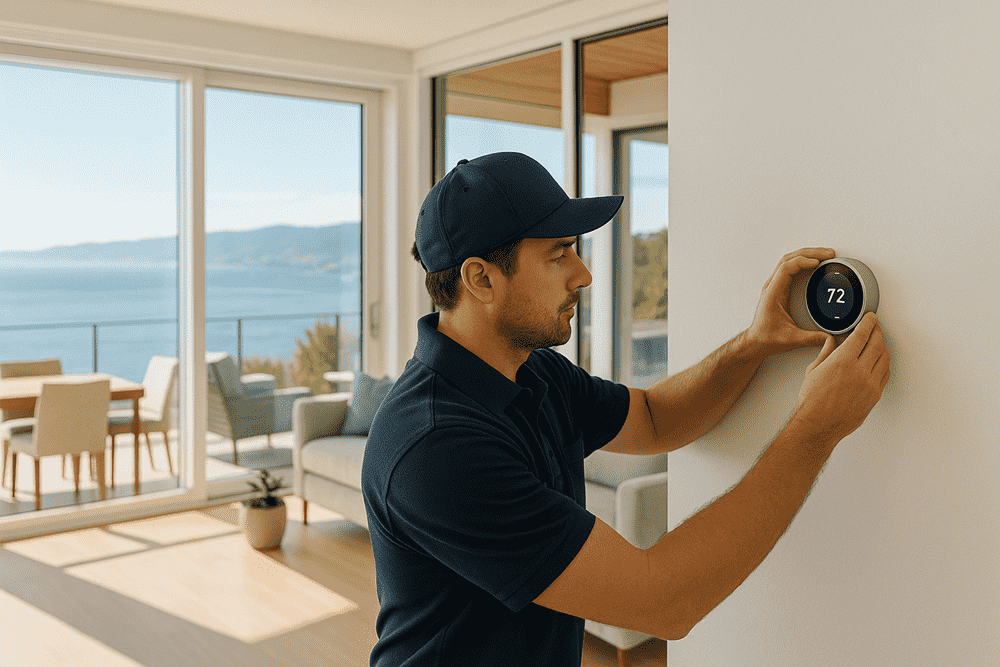
When to Upgrade Your Thermostat for Better Control

TL;DR: In California, an outdated thermostat can lead to inefficiencies and higher energy bills. Signs it’s time to upgrade include manual adjustments, inconsistent temperatures, and lack of digital features. Upgrading to a smart thermostat offers energy savings, remote access, improved comfort, and environmental benefits. Ensure compatibility with your HVAC system, and enjoy features like learning algorithms, energy reports, and voice control. Contact Elevated Comfort for expert advice and installation to enhance your home’s comfort and efficiency with a smart thermostat today.


In today’s world, technology plays a crucial role in enhancing our comfort and efficiency at home. One of the most impactful upgrades you can make is to your thermostat. An outdated thermostat can lead to inefficiencies, higher energy bills, and less control over your home’s climate. In California, where energy conservation is a top priority, upgrading to a smart thermostat can make a significant difference. Elevated Comfort, a trusted HVAC service provider in California, is here to guide you through the signs that it’s time to upgrade your thermostat and the benefits of making the switch.

Signs Your Current Thermostat is Outdated

Recognizing the signs of an outdated thermostat is the first step in improving your home’s energy efficiency and comfort. Here are some indicators that it’s time for an upgrade:

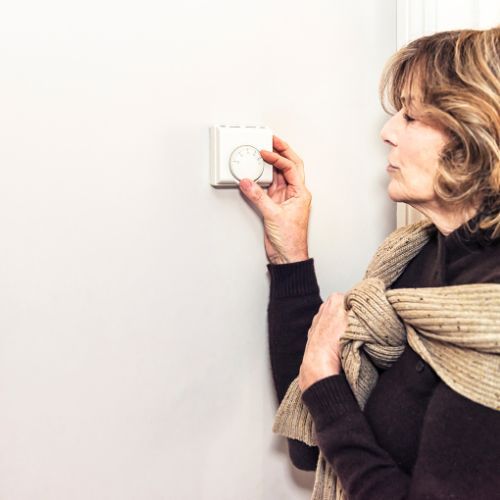
  • Manual Adjustments: If you have to manually adjust your thermostat frequently, it might be outdated. Modern thermostats offer programmable features that automate temperature settings.
  • Inconsistent Temperatures: An old or faulty thermostat can cause temperature fluctuations, making some rooms too hot or too cold.
  • High Energy Bills: Inefficient thermostats can lead to higher energy consumption, resulting in increased utility bills.
  • No Digital Display: Older thermostats with analog dials or sliders lack the precision and features of digital models.
  • Lack of Features: If your thermostat doesn’t offer scheduling, remote access, or energy reports, you’re missing out on modern conveniences.

Benefits of Upgrading to a Smart Thermostat

Upgrading to a smart thermostat comes with numerous benefits that can improve your home’s comfort and efficiency:

  • Energy Savings: Smart thermostats learn your habits and adjust settings to save energy. They can reduce your energy bills significantly by optimizing heating and cooling cycles.
  • Remote Access: With a smart thermostat, you can control your home’s temperature from anywhere using your smartphone, tablet, or computer.
  • Improved Comfort: Smart thermostats maintain consistent temperatures more effectively, ensuring a comfortable living environment.
  • Custom Schedules: You can create custom schedules that match your lifestyle, ensuring your home is always at the perfect temperature when you need it.
  • Environmental Impact: By using less energy, smart thermostats help reduce your carbon footprint, contributing to environmental sustainability.

Compatibility with Your HVAC System

Before upgrading your thermostat, it’s important to ensure compatibility with your existing HVAC system. Elevated Comfort can help you determine if a smart thermostat will work with your setup. Key considerations include:

  • System Type: Ensure the smart thermostat is compatible with your HVAC system type (e.g., central air, heat pump, furnace).
  • Wiring: Smart thermostats often require a C-wire (common wire) for power. Check if your current wiring supports this or if an adapter is needed.
  • Features: Verify that the smart thermostat supports the features you need, such as dual-zone control or multi-stage heating and cooling.

Smart Features and Connectivity

Smart thermostats come with a range of features designed to enhance convenience and efficiency. Here are some of the standout features:

  • Learning Algorithms: These thermostats learn your schedule and preferences over time, automatically adjusting settings for optimal comfort and efficiency.
  • Energy Reports: Smart thermostats provide detailed energy usage reports, helping you understand and reduce your energy consumption.
  • Voice Control: Many smart thermostats are compatible with voice assistants like Amazon Alexa and Google Assistant, allowing for hands-free control.
  • Geofencing: This feature uses your phone’s location to adjust the temperature when you leave or approach home, ensuring comfort while minimizing energy use.
  • Integration with Smart Home Systems: Smart thermostats can integrate with other smart home devices, creating a cohesive and automated home environment.

Final Thoughts

Upgrading your thermostat is a simple yet powerful way to enhance your home’s comfort, efficiency, and convenience. In California, where energy conservation is crucial, a smart thermostat can make a significant impact on your energy usage and bills. Elevated Comfort is dedicated to helping homeowners make informed decisions about their HVAC systems. Our expert technicians can assess your current setup, recommend the best smart thermostat options, and provide professional installation.

Don’t let an outdated thermostat compromise your comfort and energy efficiency. Contact Elevated Comfort today to learn more about upgrading to a smart thermostat and start enjoying the benefits of modern technology in your home.

What is the Average Cost of AC Repairs in Cotati, CA?

The average cost of AC repairs in Cotati, CA is between $100 and $800. Prices vary based on the repair’s complexity and the service provider.

Let’s break it down further to give you a clear picture of what is the average cost of AC repairs in Cotati, CA. Hopefully, this blog will give you a better idea of what to expect and potentially save some cash. And, of course, we will throw in some handy tips to save up as much as possible and avoid expensive repairs!

Factors Influencing AC Repair Costs

AC repair costs can vary a lot, even in the same city. Knowing what factors influence the price can help you prepare and make better decisions.

Type of Air Conditioning System

Different types of air conditioning systems have different repair needs and costs. Some of the most common types include:

  • Central Air Conditioning Systems: The costs can range from $300 to $1,500, especially if extensive ductwork is involved or if a major component like the compressor needs repair.
  • Ductless Mini-Split Systems: Slightly simpler than central systems, these can cost anywhere from $200 to $800 to repair. They have fewer components but still require specialized knowledge.
  • Window Units and Portable Units: These are the most straightforward to repair, with costs usually ranging between $150 and $300
  • Heat Pumps: These are expensive to repair because of their dual heating and cooling function. Expect costs between $400 and $1,600 for major repairs.

Type and Severity of the Problem

The specific issue you’re dealing with can drastically influence repair costs. Here’s a breakdown of some common problems and their associated costs:

  • Refrigerant Leaks: These range from $200 to $1,500. The cost depends on the extent of the leak and whether a full recharge is necessary. The type of refrigerant also plays a role. Older systems using R22 refrigerant will cost more due to its phase-out and limited availability.
  • Thermostat Repairs or Replacement: A simple thermostat repair could cost $150 to $250, while replacing it, especially with a smart thermostat, could range from $200 to $500.
  • Compressor Repair or Replacement: Compressors are vital and costly to repair or replace, typically ranging from $600 to $1,200. If a replacement is required, you might even be looking at up to $2,000 or more.
  • Electrical Issues: These can vary widely from $100 for a simple fix like replacing a capacitor to $500 or more for more complex electrical rewiring or replacement of circuit boards.
  • Fan Repair or Replace: These cost between $200 and $700, depending on the type and location of the motor.

Labor Costs in Cotati, CA

Labor costs in Cotati typically range from $75 to $150 per hour for HVAC repairs – this rate varys based on the experience of the technician and how big the issue is. Generally, more experienced technicians charge higher rates, but they might also complete the job more quickly and efficiently.

Age and Condition of the AC Unit

Older AC units often cost more to repair. Parts for older models might be harder to find, and there’s a higher likelihood of multiple components failing simultaneously. If your AC unit is over 10 to 15 years old, you may face higher repair costs.

Accessibility and Installation Location

If your unit is installed in a hard-to-reach area like an attic, a basement, or a cramped utility closet, the technician may charge extra for the added effort and time required to access the unit.

Seasonal Demand

AC repairs tend to spike in cost during peak summer months when HVAC companies are in high demand. If you can schedule maintenance or address minor issues during off-peak seasons, you might save money.

Detailed Breakdown of Common AC Repairs in Cotati, CA

Understanding the specifics of different types of repairs can help you anticipate costs better. Here’s a closer look at some common repairs and their costs:

Refrigerant Leak Detection and Repair

Average Cost: $200 – $1,500

  • Details: Repairing a refrigerant leak involves finding the leak, sealing it, and then recharging the system with refrigerant. This process can be time-consuming if the leak is difficult to locate.

Thermostat Repair or Replacement

Average Cost: $150 – $500

  • Details: If your thermostat is malfunctioning, the repair might involve recalibrating it or fixing a wiring issue. For replacements, opting for a smart thermostat can increase initial costs but might save you money in the long run through better energy efficiency.

Compressor Repair or Replacement

Average Cost: $600 – $1,200 (could go up to $2,000+ for replacements)

  • Details: The most important part of the AC unit, responsible for circulating refrigerant. If this one fails, repairs or replacements can be expensive, even on the low-end.

Electrical Repairs

Average Cost: $100 – $500

  • Details: Electrical problems can range from minor issues like a blown fuse or tripped breaker to more significant problems involving the unit’s circuitry. Electrical repairs are crucial for safe operation and should be addressed immediately.

Fan Motor Repair or Replacement

Average Cost: $200 – $700

  • Details: The fan motor is responsible for blowing air over the evaporator coil and throughout your home. When it fails, the AC won’t cool effectively. Repairing or replacing it is essential for restoring your unit’s functionality.

Condenser Coil Replacement

Average Cost: $900 – $2,800

  • Details: The condenser coil is a critical component for heat exchange in an AC system. Replacing it is one of the more expensive repairs due to the part’s cost and the labor involved.

Tips to Save Money on AC Repairs

No one enjoys unexpected repair bills, especially in the sweltering summer heat. Here are some practical tips to help you save money on AC repairs:

Schedule Regular Maintenance

Regular maintenance is key to extending the life of your AC unit and catching problems early before they turn into costly repairs. Many HVAC companies offer maintenance packages that include regular check-ups, cleanings, and discounts on repairs.

Replace Air Filters Regularly

A simple but effective way to keep your AC running smoothly is by replacing or cleaning the air filters regularly. Clogged filters can reduce efficiency, increase wear and tear, and lead to higher repair costs.

Perform Basic Troubleshooting

Before calling a professional, check for simple issues like a tripped breaker, a blocked condenser, or a malfunctioning thermostat. Often, these minor issues can be resolved without a costly service call.

Get Multiple Quotes

Don’t settle for the first quote you receive. Getting multiple quotes from different HVAC companies allows you to compare prices, services, and warranties. This ensures you’re getting the best value for your money.

Consider a Service Contract or Maintenance Plan

Many HVAC companies, including Elevated Comfort, offer service contracts that provide regular maintenance and discounts on repairs. These plans can save you money over time and ensure your unit is always in top shape.

Time Your Repairs Wisely

If your AC unit needs minor repairs or maintenance, try to schedule them during the off-season (fall or spring). During these times, HVAC companies are less busy and might offer discounts or lower rates.

Invest in Energy-Efficient Upgrades

While it might cost more upfront, investing in a new, energy-efficient AC unit can pay off in the long run with lower energy bills and fewer repairs.

When to Replace Instead of Repair

Sometimes, repairing an old or inefficient AC unit isn’t the best financial decision. Here’s when you might consider replacing your AC instead of continually repairing it:

Frequent Breakdowns

If you call for multiple repairs in a year, that should be the main signs that your AC is near the end of its life. Frequent breakdowns not only disrupt your comfort but can also add up to a significant expense over time.

High Repair Costs Relative to Replacement

A good rule of thumb is if a repair costs more than 50% of the price of a new unit, replacement might be a better option. Newer models are more energy-efficient and come with warranties, providing peace of mind and potential savings on energy bills.

Age of the Unit

If your AC unit is over 10 to 15 years old, it’s likely less efficient than newer models and more prone to breakdowns. Replacing an old unit can provide better cooling efficiency, lower energy bills, and fewer repair headaches.

Rising Energy Bills

Older AC units tend to be less energy-efficient. If you notice a significant increase in your energy bills, even with regular maintenance, it might be time to upgrade to a more efficient model.

Poor Indoor Air Quality

If your AC unit is contributing to poor indoor air quality, with excessive dust, allergens, or humidity issues, replacing it with a newer system with better filtering could improve your home’s comfort and health.

Key Takeaways on AC Repair Costs in Cotati, CA

Navigating the costs of AC repairs in Cotati, CA, can be challenging, but being informed about the factors affecting these costs helps you make better decisions. Whether you’re dealing with a minor issue or a major breakdown, knowing what to expect and how to choose the right HVAC professional is crucial.

If you’re facing AC issues or want to prevent future problems with regular maintenance, reach out to Elevated Comfort. Our team of experienced technicians is dedicated to providing high-quality, affordable HVAC services in Cotati and surrounding areas. Give us a call today to keep your home cool and comfortable all year round!

FAQs

What are the hidden costs of AC repairs I should be aware of?

While most repair costs are straightforward, some hidden costs might include diagnostic fees, emergency service charges (especially during off-hours), and potential permit fees for significant repairs. 

How long do most AC repairs take to complete?

Most common AC repairs can be completed within 2 to 4 hours. However, the time can vary depending on the issue’s complexity and the unit’s accessibility.

Can a dirty filter cause my AC to break down?

Yes, a dirty filter restricts airflow, causing the system to work harder and potentially overheat. Over time, this can lead to various issues, from frozen coils to complete system failures. 

Is it worth repairing an AC unit with a refrigerant leak?

Small leaks might be worth repairing, but if your system uses outdated refrigerants like R22 or has multiple leaks, replacement might be a better long-term solution due to the cost of recharging and future leak risks.

Why does my AC unit freeze up, and how can it be fixed?

An AC unit might freeze up due to various reasons, including low refrigerant levels, dirty filters, or blocked airflow. The first step is to turn off the unit to let it thaw and then call a technician to diagnose the root cause. 

Can I run my AC without a filter temporarily?

We don’t recommend running your AC without a filter, even if temporarily. The filter prevents dust, dirt, and debris from entering the unit and damaging internal components. Without a filter, these contaminants can cause clogs, reduce efficiency, and lead to costly repairs. Always have a replacement filter on hand to avoid this situation.

Are there any DIY fixes for minor AC problems?

Yes, there are a few minor issues you can address yourself, such as resetting the thermostat, ensuring the breaker hasn’t tripped, replacing a dirty air filter, or clearing obstructions around the outdoor unit. However, for more complex issues involving electrical or refrigerant components, it’s best to call a professional to avoid safety risks.


What is the Average Cost of AC Installation in Cotati, CA?

The average cost of AC installation in Cotati, CA is between $2,500 and $12,000, depending on the system’s size and complexity. For the most accurate estimate, consult local HVAC contractors.


In Cotati, where summer lasts 4.2 months out of the year, the only way to escape the heat is to stay inside your home. If that home has an AC, that would be even better. That’s why many residents invest in air conditioning for their homes and apartments.

However, AC installation services aren’t a small expense, and homeowners deserve to know what they can expect to pay before they start the process. So, what is the average cost of AC installation in Cotati, CA? Homeowners should be aware of the factors influencing final pricing, including the type of unit chosen, installation requirements, and any additional features.

Let’s break down the major expenses and miscellaneous costs related to AC installation in Cotati, CA. Knowing these numbers upfront will help you plan your budget more effectively.

What Goes Into AC Installation Costs

When you want to place an AC in your home, installation is only one of the expenses you must budget for. The final price includes various other elements that can increase the total costs. Knowing what else you need to pay for can better prepare your budget for the entire project.

Type of AC System

Central ACs usually require ductwork and additional components, which can increase your initial investment. Ductless mini-splits are a versatile option with targeted cooling in specific areas. While they may have lower installation costs due to the absence of ductwork, their units can be pricier.

Window units provide a cost-effective cooling solution for smaller areas, but their cooling capabilities are much weaker than central AC systems. Portable AC units provide mobility and easy setup, but they can be less efficient and may cost more in electricity usage.

Size of the Unit

The size of the unit significantly influences the price. Larger units often require more extensive installation work and materials, while smaller units may be more straightforward to set up. You should consult a professional to figure out the correct size based on:

  • Square footage
  • Existing insulation
  • Local climate

By making this assessment before your purchase, you ensure that you get a system that will function properly and save you money on energy costs. 

Installation Complexity

Homes with existing ductwork typically have lower installation costs for central air conditioning systems than homes without ductwork. The extra work can drive up the total cost if you need upgrades for electrical systems or structural modifications.

Ductless mini-split installations require extra labor to mount and connect the indoor units to the outdoor compressor. Other scenarios that could complicate installation include challenging access to certain areas of your home or the need for special tools or materials. It’s wise to consider these potential challenges when budgeting for your AC installation to avoid unexpected expenses.

Seasonal Demand

During peak months, such as late spring and summer, many homeowners rush to install or upgrade their AC systems to cope with the heat. This high demand often increases prices by at least 20%, as contractors may charge more for their services due to the volume of work and limited availability.

You may also find it challenging to schedule an installation during this busy time. To secure a better rate, consider scheduling your installation during the off-peak season, typically in the fall or early spring. Additionally, AC manufacturers might offer promotions or rebates during the off-season.

Labor Costs

In Cotati, CA, average labor rates for HVAC professionals generally range from $75 to $150 per hour. Remember that the total labor cost will depend on the time needed to complete the installation, which can vary based on factors like the type of AC system and any additional modifications required.

While some homeowners consider a DIY installation to save money, this approach often has risks. A successful installation requires specific knowledge of:

  • Electrical systems.
  • Refrigerant handling.
  • Local building codes.

If you make any errors during installation, you could be looking at potential damage to the unit or even safety hazards. Professional AC installation guarantees accurate setup, preventing future complications.

Average Cost Breakdown for AC Installation in Cotati, CA

When planning for air conditioning installation in Cotati, CA, it’s essential to know the average costs of various systems. The price is directly influenced by the system’s complexity. For example:

  • Central air conditioning systems, including installation, are popular and generally range from $3,000 to $7,500. This price usually covers labor, equipment, and essential materials.
  • Ductless mini-split systems are the best choice for properties that don’t have any ducts. Expect to pay between $2,000 and $5,000 for a ductless system, depending on the number of zones you need.
  • Window units are a more budget-friendly option, typically costing between $150 and $800 each, but they may not cool larger areas effectively.
  • Portable air conditioners can range from $250 to $700 and are a convenient alternative to committing to a permanent installation.

You should also consider the units’ efficiency ratings when making your selection. Higher SEER ratings can lower energy bills, which is worth considering. Costs can quickly add up if you need extensive ductwork or specialized electrical work.

Other Costs to Consider

Expenses other than installation costs can arise when adding an AC to your home. AC installation often requires building permits and inspections, with fees varying based on local regulations. The cost of permits ranges from $100 to $500, depending on the installation’s complexity and any required inspections.

Maintenance plans can cost anywhere from $100 to $300 annually. Warranties also play a role – while most systems come with a standard manufacturer warranty, you may want to invest in an extended warranty for added peace of mind. Extended warranties can cost anywhere from $200 to $600, depending on the coverage.

Tips for Reducing AC Installation Costs

Look for seasonal promotions if you want to be financially savvy and reduce AC installation costs. Many companies that install ACs run sales during the spring or fall when demand is lower. You’ll get better discounts and technician availability if you schedule the AC installation during the off-season.

You should also explore local utility company programs providing financial incentives for upgrading to energy-efficient systems. These programs offer rebates that can substantially lower your upfront costs. To make the HVAC investment more manageable, explore financing options available through many contractors. Review the terms and interest rates to clarify what you’ll be paying over time.

Regular maintenance of your AC unit can also save you money. By ensuring your system runs efficiently, you can reduce energy costs and extend the unit’s lifespan, minimizing the need for expensive repairs. Ensure you have a professional checkup at least once per day to identify and address potential issues, and you’ll see the long-term cost benefits of this investment.

Choosing the Right HVAC Contractor

Hiring a licensed and insured HVAC contractor is the key to lowering AC repairs and maintenance costs after installation. Check for valid licenses and insurance coverage, protecting you from potential liabilities. Verify the contractor’s HVAC qualifications by ensuring they are certificated by recognized organizations such as NATE or EPA. When evaluating potential contractors, watch for red flags such as:

  • Lack of references
  • High-pressure sales tactics
  • Vague estimates

It’s a red flag for a contractor to be reluctant to provide a written contract or answer your questions. Their communication style and professionalism can tell you a lot about them. Reputable contractors don’t shy away from explaining options and addressing concerns. Be cautious and alert for these warning signs when evaluating potential contractors.

Find AC Installation Experts Near You

Investing in a quality air conditioning installation is a significant financial commitment, often costing several thousand dollars. The extra costs and expenses of this task also drive up that number. Homeowners deserve to know the actual prices of this service so they can fit it into their budget without any costly surprises.

If you need AC installation experts with fair and transparent prices in Cotati, CA, look no further than Elevated Comfort. We are the first choice of many Cotati residents thanks to our fair and transparent pricing and quality work. We always provide detailed, free quotes without hidden fees, setting us apart from the competition. When you choose Elevated Comfort, you get to work with experienced technicians who will give you the best service possible each time.

Don’t let the heat get you down—reach out today and enjoy your AC tomorrow! 

FAQ

What is the cost of labor in Cotati?

Labor costs for AC installation in Cotati typically range from $50 to $100 per hour and are determined by the complexity of the job and the technician’s experience. Expect the installation process to take several hours, which can add up. Always get quotes from multiple contractors to ensure you find a fair price for your installation.

How much time will the AC installation take?

AC installation in Cotati usually takes 4 to 12 hours, depending on your AC unit, the system’s complexity, and your home’s layout. If installing a central AC system, expect it to take longer than a window unit. Schedule the installation at a convenient time to account for any unexpected delays.

Is it cheaper to install the AC unit myself?

While DIY installation may seem less expensive, it often leads to issues that can cost more in the long term. Professional installers have the experience and tools to do the job correctly and safely. They also ensure the unit is appropriately calibrated and compliant with local codes. Investing in professional help usually pays off through better efficiency and fewer problems.

What should I do if my AC unit is not cooling correctly after installation?

First, check the thermostat settings to see if they are set correctly. Inspect the air filters and replace them if necessary. If the issue persists, it’s best to contact your installer or a technician. They can troubleshoot the problem and make sure your unit runs efficiently.

How to Prepare Your HVAC System for a Vacation

TL;DR: Before vacationing, prep your HVAC system to save energy and safeguard your home. Unplug non-essential electronics to reduce energy use and prevent electrical issues. Schedule a maintenance check with Elevated Comfort to ensure your HVAC system runs smoothly while you’re away, covering thermostat inspection, leak checks, coil cleaning, and more. Enjoy peace of mind on vacation knowing your home is in good hands.


Taking a vacation is a great way to relax and recharge, but before you head out, it’s important to ensure your home and HVAC system are prepared. Properly setting up your HVAC system can save energy, reduce costs, and keep your home safe while you’re away. For residents in California, where temperatures can vary greatly, making these preparations is especially important. In this blog, we’ll guide you through the steps to prepare your HVAC system for vacation. Elevated Comfort, a trusted HVAC service provider in California, is here to help you with these essential tips.

Set Your Thermostat

One of the easiest and most effective ways to prepare your HVAC system for vacation is to adjust your thermostat. Set it to a temperature that conserves energy while keeping your home safe:

  • During the Summer: Set your thermostat to around 85°F. This will prevent your home from getting too hot and causing damage to sensitive items while saving on cooling costs.
  • During the Winter: Set your thermostat to around 55°F to prevent pipes from freezing and ensure your home remains moderately warm without excessive heating costs.

If you have a programmable or smart thermostat, you can set it to return to a comfortable temperature a few hours before you arrive home.

Clean or Replace Air Filters

Before you leave, make sure to clean or replace your HVAC system’s air filters. Dirty filters can restrict airflow, making your system work harder and less efficiently. By ensuring your filters are clean, you can maintain better air quality and improve the overall efficiency of your system, which is especially important while you’re away.

Unplug Non-Essential Electronics

Unplugging non-essential electronics is a simple step that can help reduce energy consumption and protect your devices from power surges. This includes appliances like:

  • Televisions
  • Computers
  • Kitchen appliances
  • Chargers

By unplugging these items, you can save on energy costs and reduce the risk of electrical issues while you’re not home.

Schedule a Maintenance Check

Before leaving for vacation, consider scheduling a maintenance check with Elevated Comfort. Their experienced technicians can perform a thorough inspection of your HVAC system to ensure everything is running smoothly. This includes checking for any potential issues that could arise while you’re away, such as:

  • Inspecting the thermostat
  • Checking for leaks or blockages
  • Cleaning coils and other components
  • Ensuring proper operation of all parts

A maintenance check can give you peace of mind knowing that your HVAC system is in good hands while you enjoy your time away.

Final Thoughts

Preparing your HVAC system for vacation is a smart way to save energy, reduce costs, and ensure your home remains safe and comfortable while you’re away. By setting your thermostat appropriately, cleaning or replacing air filters, unplugging non-essential electronics, and scheduling a maintenance check with Elevated Comfort, you can enjoy your vacation with peace of mind. Elevated Comfort is dedicated to helping California residents maintain their HVAC systems and keep their homes comfortable year-round. Contact Elevated Comfort today to schedule a maintenance check or to learn more about their services. Enjoy your vacation knowing your home is well taken care of!

Understanding the Benefits of Using Ceiling Fans with HVAC Systems

TL;DR: Using ceiling fans alongside your HVAC system boosts comfort and energy efficiency in your California home. They distribute air evenly, reducing HVAC workload and cutting energy bills. Adjust fan direction: counterclockwise in summer for cooling and clockwise in winter to circulate heat. For expert guidance and installation, contact Elevated Comfort to optimize your home’s comfort and efficiency year-round.

Using ceiling fans in conjunction with your HVAC system can significantly enhance your home’s comfort and energy efficiency. Ceiling fans help distribute air more evenly throughout your living spaces, reducing the workload on your HVAC system and ultimately lowering your energy bills. In California, where temperature fluctuations are common, utilizing ceiling fans can provide a cost-effective way to maintain a comfortable indoor environment year-round. Elevated Comfort, a trusted HVAC service provider in California, is here to guide you on how to maximize the benefits of using ceiling fans with your HVAC system.

Benefits of Combining Ceiling Fans with HVAC Systems

  • Energy Savings: Ceiling fans allow you to set your thermostat a few degrees higher in the summer and lower in the winter without sacrificing comfort, leading to reduced energy consumption and cost savings.
  • Improved Comfort: By circulating air more effectively, ceiling fans help eliminate hot and cold spots, creating a more consistent and comfortable indoor temperature.
  • Extended HVAC Lifespan: Reducing the strain on your HVAC system by using ceiling fans can help prolong the life of your heating and cooling equipment, minimizing the need for costly repairs or replacements.
  • Enhanced Air Quality: Ceiling fans help distribute fresh air throughout your home, preventing the buildup of stagnant air and improving overall indoor air quality.

Optimizing Ceiling Fan Direction for Seasonal Comfort

Ceiling fan direction plays a crucial role in optimizing comfort and energy efficiency. By adjusting the direction of your ceiling fan blades based on the season, you can maximize the benefits of air circulation.

Summer: Counterclockwise Direction

During the summer months, set your ceiling fan to rotate counterclockwise. This direction creates a cooling breeze by pushing air down, which helps evaporate sweat and makes you feel cooler. As a result, you can raise your thermostat by a few degrees, reducing the load on your air conditioner and saving on energy costs.

Winter: Clockwise Direction

In the winter, switch your ceiling fan to rotate clockwise at a low speed. This setting draws cool air up and pushes warm air down from the ceiling, distributing heat more evenly throughout the room. This allows you to lower your thermostat slightly, easing the burden on your heating system and enhancing energy efficiency.

Enhancing Air Circulation and Indoor Air Quality

Ceiling fans not only improve temperature control but also enhance air circulation and indoor air quality. Proper air circulation helps prevent the buildup of pollutants, allergens, and moisture, creating a healthier living environment.

Benefits of Enhanced Air Circulation

  • Reduced Humidity: Ceiling fans help reduce indoor humidity levels by promoting better air circulation, which can prevent mold and mildew growth.
  • Improved Air Quality: By continuously moving air, ceiling fans help filter and disperse pollutants, allergens, and odors, resulting in cleaner, fresher indoor air.
  • Comfortable Environment: Enhanced air circulation helps maintain a consistent indoor temperature, reducing the likelihood of hot and cold spots and ensuring a more comfortable living space.

Tips for Choosing the Right Ceiling Fan for Your Space

Selecting the right ceiling fan for your home is essential for maximizing its benefits. Consider the following factors when choosing a ceiling fan:

Size and Blade Span

Choose a ceiling fan with an appropriate blade span for the size of your room. Larger rooms require fans with a greater blade span to ensure adequate air circulation, while smaller rooms benefit from fans with a smaller blade span.

Ceiling Height

Ensure that your ceiling fan is installed at the correct height for optimal performance. For standard ceilings, a fan should be mounted 8-9 feet from the floor. For higher ceilings, consider using a downrod to lower the fan to the appropriate height.

Energy Efficiency

Look for Energy Star-rated ceiling fans, which are designed to be more energy-efficient and cost-effective. These fans consume less electricity while providing excellent air circulation.

Style and Design

Choose a ceiling fan that complements your home’s decor. Ceiling fans come in a variety of styles, finishes, and designs, allowing you to find one that matches your aesthetic preferences.

Additional Features

Consider ceiling fans with additional features such as remote controls, adjustable speeds, and integrated lighting for added convenience and functionality.

Final Thoughts

Integrating ceiling fans with your HVAC system is a smart and cost-effective way to enhance comfort, improve air quality, and reduce energy consumption in your California home. By optimizing fan direction for seasonal comfort and selecting the right ceiling fan for your space, you can maximize the benefits of this powerful combination. Elevated Comfort is dedicated to helping you achieve optimal indoor comfort and efficiency. Contact Elevated Comfort today for expert advice and professional HVAC services, and start enjoying the benefits of using ceiling fans to complement your HVAC system.

How to Optimize Your HVAC System for Seasonal Changes

 TL;DR: In California, where weather varies widely, preparing your HVAC system for seasonal shifts is crucial. Understand seasonal HVAC needs for efficient operation and lower utility bills. Regular maintenance, including air filter replacements and coil cleaning, ensures peak performance. Prepare for fall by scheduling a professional inspection, cleaning outdoor units, adjusting thermostat settings, and testing heating functionality. For winter, change air filters, clean vents, inspect insulation, seal drafts, and schedule a tune-up to maintain warmth and efficiency. Elevate Comfort offers tailored services to keep your HVAC system running smoothly year-round.


As the seasons change, so do the demands on your HVAC (Heating, Ventilation, and Air Conditioning) system. In California, where weather conditions can vary widely, optimizing your HVAC system for seasonal changes is essential to maintain comfort and efficiency throughout the year. Elevated Comfort, a trusted HVAC service provider in California, is dedicated to helping homeowners prepare their systems for these transitions. This blog will guide you through understanding seasonal HVAC needs, the importance of regular maintenance, and specific steps to prepare your system for fall and winter.

Understanding Seasonal HVAC Needs

Each season brings different requirements for your HVAC system. In California, summer often demands robust cooling capabilities, while winter requires reliable heating. Fall serves as a transitional period where both cooling and heating might be necessary on different days. Understanding these needs helps you optimize your HVAC system accordingly, ensuring it operates efficiently and effectively regardless of the season.

Efficient HVAC operation during seasonal transitions not only enhances comfort but also reduces energy consumption and lowers utility bills. By adjusting your system to meet the specific demands of each season, you can prevent unnecessary strain and extend the lifespan of your equipment.

Importance of Regular Maintenance

Regular maintenance is the cornerstone of an efficient HVAC system. Without proper care, even the most advanced systems can lose efficiency over time. Here are key maintenance tasks to keep your HVAC system in top shape:

  • Replace Air Filters: Dirty air filters restrict airflow, making your system work harder. Replace filters every 1-3 months to ensure optimal performance.
  • Clean Coils: Dust and debris can accumulate on coils, reducing their ability to absorb and release heat. Clean them annually to maintain efficiency.
  • Inspect Ductwork: Leaks or blockages in the ductwork can significantly reduce efficiency. Regularly inspect and seal any leaks to improve airflow.
  • Check Thermostat Settings: Ensure your thermostat is set appropriately for the season. Consider upgrading to a programmable thermostat for better control.
  • Lubricate Moving Parts: Friction in moving parts can increase energy use. Regularly lubricate these parts to keep the system running smoothly.

Elevated Comfort offers comprehensive HVAC maintenance services tailored to the unique needs of California homeowners. Our expert technicians can help you ensure your system is prepared for seasonal changes, providing peace of mind and optimal comfort.

Preparing Your HVAC System for Fall

Fall in California can bring a mix of warm days and cool nights, requiring your HVAC system to be flexible. Here are some steps to prepare your system for the fall season:

  • Schedule a Professional Inspection: A thorough inspection by Elevated Comfort can identify any potential issues and ensure your system is ready for the cooler months ahead.
  • Clean and Inspect Outdoor Units: Clear any debris around outdoor units to ensure proper airflow. Inspect for any signs of damage or wear.
  • Adjust Thermostat Settings: Set your thermostat to accommodate the changing temperatures. A programmable thermostat can automatically adjust settings based on the time of day.
  • Test Heating Functionality: Before the cold weather hits, test your heating system to ensure it’s working correctly. Address any issues immediately to avoid surprises later.

By taking these steps, you can ensure your HVAC system operates efficiently and effectively throughout the fall, maintaining comfort in your home.

Preparing Your HVAC System for Winter

Winter in California, while milder than in many parts of the country, still requires a reliable heating system. Here’s how to prepare your HVAC system for the colder months:

  • Change Air Filters: Clean air filters are crucial for efficient operation. Replace them before winter to ensure optimal airflow.
  • Check and Clean Vents: Make sure all vents and registers are clean and unobstructed to allow for proper airflow throughout your home.
  • Inspect Insulation: Proper insulation helps maintain indoor temperatures and reduces the load on your HVAC system. Check attic and wall insulation and add more if necessary.
  • Seal Drafts: Inspect windows and doors for drafts and seal any gaps with weatherstripping or caulk to prevent heat loss.
  • Schedule a Professional Tune-Up: Elevated Comfort can provide a comprehensive tune-up to ensure your heating system is ready for winter, checking everything from the thermostat to the heat exchanger.

Taking these steps helps ensure your home remains warm and comfortable throughout the winter, while also keeping your energy bills in check.

Final Thoughts

Optimizing your HVAC system for seasonal changes is essential for maintaining comfort, efficiency, and longevity. In California, where the weather can vary greatly, it’s crucial to understand your HVAC system’s seasonal needs and perform regular maintenance. Elevated Comfort is here to help with professional services tailored to your home’s specific requirements.

By preparing your HVAC system for fall and winter, you can enjoy a comfortable living environment year-round. Contact Elevated Comfort today to schedule a maintenance check or inspection and ensure your HVAC system is ready for the changing seasons.

Do you need to Winterize Your Plumbing?

TL;DR: Winterizing your plumbing in California is crucial to prevent freezing and costly damage. Elevated Comfort advises insulating exposed pipes, disconnecting outdoor hoses, shutting off outdoor faucets, sealing gaps, maintaining indoor temperatures, and considering professional assistance for comprehensive protection. Benefits include peace of mind, cost savings from avoiding repairs, enhanced home comfort, and improved energy efficiency. Prepare your home for winter with expert guidance from Elevated Comfort to safeguard your plumbing system and ensure a trouble-free season.

As the temperatures drop, it’s crucial to prepare your home for the colder months ahead. While California is known for its mild winters, certain areas can still experience significant temperature drops that can affect your plumbing system. Winterizing your plumbing can help prevent damage, save money on repairs, and ensure your home remains comfortable and functional throughout the season. Elevated Comfort, a trusted HVAC and plumbing service provider in California, is here to guide you through the process of winterizing your plumbing and explain why it’s essential for homeowners.

Understanding the Importance of Winterizing Plumbing

Winterizing your plumbing involves taking steps to protect your pipes and fixtures from freezing temperatures. Even in California, where winters are generally mild, sudden cold snaps can cause pipes to freeze and burst. This can lead to extensive water damage, costly repairs, and significant inconvenience. By winterizing your plumbing, you can:

  • Prevent Pipe Bursts: Freezing water expands and can cause pipes to burst, leading to water damage and expensive repairs.
  • Avoid Costly Repairs: Taking preventive measures can save you money by avoiding emergency repairs and replacements.
  • Maintain Comfort and Functionality: Ensuring your plumbing system is protected means you won’t have to worry about losing access to water during cold weather.

Signs Your Plumbing Needs Winterizing

Not all homes require extensive winterization, but certain signs indicate that your plumbing could benefit from it:

  • Exposed Pipes: Pipes located in unheated areas such as garages, basements, crawl spaces, and attics are more susceptible to freezing.
  • Outdoor Faucets: Exterior faucets and hose bibs can freeze easily if not properly winterized.
  • Previous Freezing Issues: If you’ve experienced frozen pipes in the past, it’s a good indicator that your plumbing needs winterizing.
  • Cold Climate Areas: Homes located in parts of California that experience colder temperatures are at higher risk and should be winterized accordingly.

If you notice any of these signs, it’s time to take action to protect your plumbing system.

Steps to Winterize Your Plumbing

Winterizing your plumbing involves several steps to ensure all vulnerable areas are protected. Here’s a comprehensive guide to help you get started:

  1. Insulate Pipes: Use pipe insulation or heat tape to cover exposed pipes in unheated areas. This helps prevent freezing and keeps water flowing smoothly.
  2. Disconnect and Drain Outdoor Hoses: Remove garden hoses from outdoor faucets and store them indoors. Drain any remaining water from the faucets to prevent freezing.
  3. Shut Off and Drain Outdoor Faucets: Locate the shut-off valve for outdoor faucets and turn it off. Open the outdoor faucet to allow any remaining water to drain out.
  4. Seal Gaps and Cracks: Inspect your home for gaps or cracks around pipes that enter the house. Seal these openings with caulk or insulation to keep cold air out.
  5. Maintain Indoor Temperature: Keep your home’s thermostat set to at least 55°F, even when you’re away. This helps ensure that indoor pipes remain warm enough to prevent freezing.
  6. Open Cabinet Doors: Open cabinet doors under sinks in the kitchen and bathrooms to allow warm air to circulate around the pipes.
  7. Use a Space Heater: In extremely cold areas, consider using a space heater to keep unheated spaces warm and prevent pipes from freezing.

Elevated Comfort can assist you with professional winterization services, ensuring your plumbing system is fully protected.

Benefits of Winterizing Your Plumbing

Winterizing your plumbing offers several benefits that make it a worthwhile investment:

  • Peace of Mind: Knowing your plumbing is protected from freezing temperatures provides peace of mind during the winter months.
  • Cost Savings: Preventing pipe bursts and water damage can save you significant money on repairs and replacements.
  • Enhanced Home Comfort: A well-maintained plumbing system ensures your home remains comfortable and functional, even during cold weather.
  • Energy Efficiency: Proper insulation and sealing can improve your home’s overall energy efficiency, reducing heating costs.

By taking the time to winterize your plumbing, you can enjoy these benefits and avoid the stress of dealing with plumbing emergencies.

Final Thoughts

Winterizing your plumbing is an essential step in preparing your California home for the colder months. By understanding the importance, recognizing the signs, and following the steps to winterize your plumbing, you can prevent costly damage and ensure your home remains comfortable and functional. Elevated Comfort is here to help with expert winterization services tailored to your needs. Contact Elevated Comfort today to schedule an appointment and protect your plumbing system this winter.

The Impact of Insulation on Your HVAC Performance

TL;DR: Insulation is crucial for maintaining comfort and energy efficiency in your California home. It reduces heat transfer, lowers energy bills, and enhances HVAC performance by minimizing workload.Elevated Comfort offers professional assessment and installation to optimize your home’s insulation and HVAC efficiency—contact us for expert guidance.

Insulation is a critical component of your home’s overall comfort and energy efficiency. In California, where temperatures can vary greatly between seasons, having proper insulation is essential for maintaining a comfortable indoor environment and optimizing your HVAC system’s performance. Elevated Comfort, a trusted HVAC service provider in California, is here to explain the impact of insulation on your HVAC performance, the types of insulation available, and the benefits of ensuring your home is well-insulated.

Understanding Insulation and Its Types

Insulation works by reducing the amount of heat transfer between the inside and outside of your home. This helps maintain a consistent indoor temperature, reducing the workload on your HVAC system. There are several types of insulation, each with its own characteristics and applications:

  • Fiberglass Insulation: Made from fine glass fibers, this is one of the most common types of insulation. It is available in batts or rolls and is often used in walls, attics, and floors.
  • Cellulose Insulation: Composed of recycled paper products treated with fire retardant, cellulose insulation is blown into spaces, making it ideal for insulating irregularly shaped areas and retrofitting older homes.
  • Spray Foam Insulation: This type of insulation expands upon application, forming an air-tight seal. It provides excellent thermal resistance and is used in walls, roofs, and around vents and windows.
  • Rigid Foam Insulation: Available in panels, rigid foam insulation is used for foundations, walls, and roofs. It provides high thermal resistance and adds structural strength to your home.
  • Reflective Insulation: Typically installed in attics, this insulation uses reflective materials to reduce radiant heat gain, keeping homes cooler in hot climates.

Choosing the right type of insulation for your home depends on various factors, including the climate, the area to be insulated, and your specific needs.

How Insulation Affects HVAC Performance

Proper insulation directly impacts the performance and efficiency of your HVAC system. Here’s how:

  • Reduced Heat Transfer: Insulation minimizes the amount of heat that escapes in the winter and enters in the summer, helping your HVAC system maintain a consistent indoor temperature with less effort.
  • Lower Energy Consumption: By reducing the workload on your HVAC system, insulation helps lower your energy consumption. This not only reduces your utility bills but also extends the lifespan of your HVAC equipment.
  • Enhanced Comfort: Insulation helps eliminate drafts and cold spots, providing a more comfortable living environment. It also reduces noise from outside, contributing to a quieter home.
  • Balanced Humidity Levels: Insulation helps control moisture levels within your home, preventing issues like mold growth and condensation that can affect both your comfort and health.

Benefits of Proper Insulation

Investing in proper insulation offers numerous benefits, including:

  • Energy Efficiency: Well-insulated homes require less energy for heating and cooling, resulting in significant cost savings over time.
  • Environmental Impact: Reducing your energy consumption helps lower your carbon footprint, contributing to environmental sustainability.
  • Increased Property Value: Homes with good insulation are more attractive to buyers and can command higher prices on the market.
  • Improved Indoor Air Quality: Proper insulation reduces the infiltration of outdoor pollutants, dust, and allergens, leading to better indoor air quality.
  • Long-Term Savings: While the initial investment in insulation may be significant, the long-term savings on energy bills and HVAC maintenance make it a cost-effective choice.

Elevated Comfort can assess your home’s insulation needs and provide professional installation services to help you reap these benefits.

Signs Your Home Needs Better Insulation

Recognizing the signs that your home may need better insulation is crucial for maintaining comfort and efficiency. Here are some indicators:

  • Uneven Temperatures: If some rooms in your home are consistently warmer or cooler than others, it could be a sign of inadequate insulation.
  • High Energy Bills: Unexplained spikes in your heating and cooling costs may indicate that your HVAC system is working harder due to poor insulation.
  • Drafts and Cold Spots: Feeling drafts or cold spots in your home, especially near windows, doors, and walls, is a common sign of insufficient insulation.
  • Frequent HVAC Cycling: If your HVAC system frequently turns on and off, it may be struggling to maintain the desired temperature due to heat loss or gain through poorly insulated areas.
  • Moisture and Condensation: Excessive moisture, condensation on windows, or signs of mold and mildew can indicate inadequate insulation and poor thermal performance.

If you notice any of these signs, it’s time to contact Elevated Comfort for a professional insulation assessment.

Final Thoughts

Proper insulation is vital for optimizing your HVAC system’s performance, reducing energy consumption, and maintaining a comfortable living environment. In California’s varied climate, investing in high-quality insulation can make a significant difference in your home’s efficiency and comfort. Elevated Comfort is dedicated to helping homeowners in California achieve optimal insulation and HVAC performance. Contact Elevated Comfort today to learn more about our insulation services and how we can help you enhance your home’s energy efficiency and comfort.

Understanding SEER Ratings and Energy Efficiency

TL;DR: SEER (Seasonal Energy Efficiency Ratio) ratings measure how efficiently air conditioners cool homes over a season. Higher SEER ratings indicate more energy-efficient units, reducing electricity usage, lowering bills, and lessening environmental impact. In California, where energy costs and environmental concerns are high, selecting a high-SEER-rated HVAC system can lead to significant long-term savings and comfort improvements. Elevated Comfort offers guidance on choosing and maintaining efficient systems tailored to California’s needs.

In the quest for energy efficiency and cost savings, understanding the efficiency of your HVAC system is crucial. One key metric that helps homeowners evaluate the efficiency of their air conditioning systems is the SEER rating. For residents of California, where energy costs are high and environmental concerns are paramount, selecting an HVAC system with an appropriate SEER rating can make a significant difference. Elevated Comfort, a trusted HVAC service provider in California, is here to help you understand SEER ratings and their impact on energy efficiency and savings.

What is SEER Rating?

SEER stands for Seasonal Energy Efficiency Ratio. It is a measure used to evaluate the cooling efficiency of air conditioners and heat pumps. The SEER rating represents the ratio of the cooling output of the unit over a typical cooling season, divided by the total electric energy input consumed during that period. In simpler terms, it measures how efficiently an air conditioning system can cool your home over an entire season.

The higher the SEER rating, the more energy-efficient the unit is. SEER ratings typically range from 13 to 25, with modern units often having higher ratings compared to older models.

How SEER Ratings are Calculated

SEER ratings are calculated by taking the total cooling output (measured in BTUs or British Thermal Units) over a cooling season and dividing it by the total electrical energy input (measured in watt-hours) during the same period. The formula can be expressed as:

SEER=Total Cooling Output (BTUs) / Total Energy Input (Watt-Hours)\text

This calculation considers a range of outdoor temperatures to provide an average efficiency rating that reflects real-world performance.

For example, if an air conditioner produces 60,000 BTUs of cooling over a season and consumes 5,000 watt-hours of electricity, its SEER rating would be:

SEER= 60,000 BTUs / 5,000 Watt-Hours = 12


Importance of SEER Ratings

SEER ratings are essential for several reasons:

  • Energy Efficiency: Higher SEER ratings indicate more energy-efficient units, which consume less electricity to cool your home. This leads to lower energy bills and reduced environmental impact.
  • Cost Savings: While units with higher SEER ratings may have a higher upfront cost, they can result in significant savings on your utility bills over time. The reduced energy consumption offsets the initial investment.
  • Comfort: High-efficiency units can provide better and more consistent cooling, enhancing overall comfort in your home.
  • Environmental Impact: Efficient HVAC systems reduce energy consumption, which in turn lowers greenhouse gas emissions and helps combat climate change.

In California, where energy costs and environmental concerns are high, choosing a high-SEER-rated unit can provide both financial and ecological benefits.

SEER Ratings and Energy Efficiency

SEER ratings directly correlate with the energy efficiency of an air conditioning system. Here’s how they impact energy efficiency:

  • Lower Energy Consumption: Higher SEER ratings mean the unit uses less electricity to achieve the same level of cooling, resulting in lower energy consumption.
  • Reduced Carbon Footprint: Energy-efficient units contribute to lower greenhouse gas emissions, making them more environmentally friendly.
  • Enhanced Performance: High-SEER-rated systems often come with advanced features like variable-speed compressors and smart thermostats, which optimize performance and further reduce energy use.
  • Compliance with Regulations: In California, regulations require minimum SEER ratings for new HVAC installations. Ensuring your system meets or exceeds these standards can improve efficiency and compliance.

Elevated Comfort can help you choose the right SEER rating for your home, ensuring optimal energy efficiency and comfort.

Final Thoughts

Understanding SEER ratings is crucial for making informed decisions about your HVAC system, especially in California, where energy efficiency and environmental sustainability are top priorities. By choosing a system with a high SEER rating, you can enjoy lower energy bills, enhanced comfort, and a reduced carbon footprint.

Elevated Comfort is committed to helping California homeowners select and maintain energy-efficient HVAC systems. Our expert technicians can guide you through the process of choosing the right SEER-rated unit for your home and provide professional installation and maintenance services. Contact Elevated Comfort today to learn more about SEER ratings and how we can help you achieve maximum energy efficiency and savings.

How to Detect and Fix Slab Leaks

TL;DR: Slab leaks under your home’s foundation in California can lead to severe damage if not caught early. Elevated Comfort explains the causes, signs (like water pooling, high bills, or mold), and detection methods (such as meter tests and thermal imaging). Prompt action, including professional inspections and repairs, is crucial to prevent structural issues and costly repairs. Contact Elevated Comfort for expert plumbing services to safeguard your home from the risks of slab leaks.


Slab leaks are a serious concern for homeowners, as they can lead to extensive water damage, structural issues, and costly repairs if not addressed promptly. In California, where soil conditions and aging infrastructure can exacerbate the risk of slab leaks, it’s essential to know how to detect and fix these problems early. Elevated Comfort, a trusted HVAC and plumbing service provider, is here to help you understand slab leaks, their causes, signs, and detection methods. This knowledge can help you protect your home and avoid expensive repairs.

Understanding Slab Leaks

A slab leak occurs when the water pipes located beneath the concrete foundation of your home develop a leak. These leaks can occur in both hot and cold water lines and often go unnoticed until significant damage has occurred. Slab leaks are particularly problematic because they can undermine the integrity of your home’s foundation, leading to structural damage and mold growth.

There are two main types of slab leaks:

  • Water Supply Line Leaks: These leaks occur in the pressurized water supply lines that bring water into your home. They can cause significant water damage if not detected early.
  • Drain Line Leaks: These leaks happen in the drain lines that carry wastewater away from your home. While they may not cause immediate flooding, they can lead to soil erosion and foundation issues over time.

Common Causes of Slab Leaks

Several factors can contribute to the development of slab leaks, including:

  • Soil Movement: California’s seismic activity can cause the ground to shift, putting pressure on the pipes and causing them to crack or break.
  • Aging Pipes: Over time, pipes can corrode or deteriorate, especially if they are made of materials like galvanized steel or copper, which are prone to corrosion.
  • Poor Installation: If the pipes were not installed correctly during construction, they might be more susceptible to leaks.
  • Abrasion: Pipes that are in constant contact with concrete, gravel, or other hard materials can wear down over time, leading to leaks.
  • High Water Pressure: Excessive water pressure can put a strain on pipes, causing them to burst or develop leaks.

Understanding these causes can help you take preventive measures to protect your home from slab leaks.

Signs of a Slab Leak

Detecting a slab leak early is crucial to minimizing damage and repair costs. Here are some common signs that you might have a slab leak:

  • Unexplained Increase in Water Bills: A sudden spike in your water bill without a corresponding increase in usage can indicate a hidden leak.
  • Water Pooling: Unexplained water pooling around the foundation of your home or in the yard can be a sign of a slab leak.
  • Damp or Warm Spots: Damp or warm spots on your floor, particularly in areas that should be dry, can indicate a leak beneath the slab.
  • Mold or Mildew: The presence of mold or mildew, especially in areas without obvious water sources, can be a sign of a hidden leak.
  • Sound of Running Water: If you hear the sound of running water when all fixtures are turned off, it could indicate a leak in the pipes beneath the slab.
  • Cracks in Walls or Floors: Cracks in your walls or floors can indicate foundation movement caused by a slab leak.

Steps to Detect a Slab Leak

Detecting a slab leak can be challenging, but following these steps can help you identify the problem:

  1. Monitor Your Water Bill: Keep an eye on your water bill for any unexplained increases.
  2. Check for Water Pooling: Inspect the perimeter of your home for any signs of water pooling or dampness.
  3. Perform a Meter Test: Turn off all water fixtures and check your water meter. If the meter continues to run, you may have a hidden leak.
  4. Use Thermal Imaging: Thermal imaging cameras can detect temperature differences in your flooring, indicating the presence of a leak.
  5. Listen for Running Water: Pay attention to any sounds of running water when all fixtures are turned off.
  6. Professional Inspection: If you suspect a slab leak, contact a professional plumbing service like Elevated Comfort to perform a thorough inspection using advanced leak detection equipment.

Final Thoughts

Slab leaks are a serious issue that can cause significant damage to your home if not detected and addressed promptly. Understanding the causes, signs, and detection methods can help you protect your property and avoid costly repairs. In California, where slab leaks are a common concern, Elevated Comfort offers expert plumbing services to help you detect and fix slab leaks efficiently.

If you suspect a slab leak or want to take preventive measures, contact Elevated Comfort today. Our experienced technicians are equipped with the latest tools and technology to identify and repair slab leaks, ensuring your home remains safe and sound. Don’t wait for a small leak to become a big problem—reach out to Elevated Comfort and safeguard your home from the risks of slab leaks.

The Impact of Duct Cleaning on HVAC Efficiency

TL;DR: Maintaining clean ducts is crucial for optimal HVAC performance in California. Elevated Comfort highlights how dirty ducts restrict airflow, increase energy consumption, and cause uneven heating or cooling. Regular duct cleaning improves airflow, saves energy, enhances indoor air quality, extends HVAC lifespan, and ensures consistent home comfort. Trust Elevated Comfort for professional duct cleaning to maximize HVAC efficiency and indoor comfort.


Maintaining an efficient HVAC system is essential for comfort, energy savings, and indoor air quality, especially in California’s diverse climate. One often-overlooked aspect of HVAC maintenance is duct cleaning. Clean ducts are crucial for the overall performance and efficiency of your HVAC system. Elevated Comfort, a trusted HVAC service provider in California, is dedicated to helping homeowners understand the importance of duct cleaning and how it impacts HVAC efficiency. In this blog, we’ll explore how ducts affect HVAC performance, the benefits of duct cleaning, signs that your ducts need cleaning, and how often you should clean them.

How Ducts Affect HVAC Performance

The ductwork in your home plays a vital role in distributing conditioned air throughout your living spaces. When ducts are clean and unobstructed, your HVAC system can operate efficiently. However, when ducts are dirty or clogged, several issues can arise:

  • Restricted Airflow: Dust, debris, and other contaminants can accumulate in the ducts, restricting airflow and making it harder for your HVAC system to maintain the desired temperature.
  • Increased Energy Consumption: When airflow is restricted, your HVAC system has to work harder to push air through the ducts, leading to higher energy consumption and increased utility bills.
  • Uneven Heating and Cooling: Dirty ducts can cause uneven distribution of air, resulting in hot and cold spots throughout your home.
  • System Wear and Tear: Overworking your HVAC system due to restricted airflow can lead to premature wear and tear, increasing the likelihood of breakdowns and costly repairs.

Understanding the impact of dirty ducts on HVAC performance highlights the importance of regular duct cleaning.

Benefits of Duct Cleaning

Regular duct cleaning offers several benefits that can enhance your HVAC system’s efficiency and overall home comfort:

  • Improved Airflow: Clean ducts allow for unrestricted airflow, making it easier for your HVAC system to heat or cool your home effectively.
  • Energy Savings: With improved airflow, your HVAC system doesn’t have to work as hard, leading to lower energy consumption and reduced utility bills.
  • Enhanced Indoor Air Quality: Removing dust, allergens, and other contaminants from the ducts improves indoor air quality, creating a healthier living environment.
  • Extended HVAC System Lifespan: Regular duct cleaning reduces the strain on your HVAC system, helping to extend its lifespan and reduce the need for frequent repairs.
  • Consistent Comfort: Clean ducts ensure even distribution of conditioned air, eliminating hot and cold spots and maintaining consistent comfort throughout your home.

Elevated Comfort provides professional duct cleaning services to help you enjoy these benefits and keep your HVAC system running efficiently.

Signs Your Ducts Need Cleaning

It’s essential to recognize the signs that indicate your ducts need cleaning. Here are some common indicators:

  • Visible Dust and Debris: If you see dust and debris around your air vents or notice an increase in dust accumulation in your home, your ducts may be dirty.
  • Unpleasant Odors: Foul or musty odors coming from your vents can indicate mold, mildew, or accumulated debris in the ducts.
  • Increased Allergy Symptoms: If you or your family members experience worsening allergy symptoms, it could be due to contaminants circulating through dirty ducts.
  • Poor Airflow: Reduced airflow from your vents, even when the HVAC system is running at full capacity, is a sign of clogged or dirty ducts.
  • High Energy Bills: A sudden increase in your energy bills without a corresponding increase in usage can indicate that your HVAC system is working harder due to restricted airflow.

If you notice any of these signs, it’s time to schedule a professional duct cleaning with Elevated Comfort.

How Often Should You Clean Your Ducts?

The frequency of duct cleaning depends on several factors, including the age of your home, the presence of pets, and your indoor air quality. As a general guideline:

  • Every 1-3 Years: Most homes should have their ducts cleaned every 1-3 years to maintain optimal HVAC efficiency and indoor air quality.
  • More Frequent Cleaning: Homes with pets, smokers, or residents with allergies or respiratory conditions may benefit from more frequent duct cleaning, such as every 1-2 years.
  • After Renovations: If you’ve recently completed a home renovation or construction project, it’s a good idea to have your ducts cleaned to remove any construction debris or dust.

Consulting with a professional HVAC service provider like Elevated Comfort can help you determine the best cleaning schedule for your specific needs.

Final Thoughts

Duct cleaning is a vital aspect of maintaining an efficient and effective HVAC system. By understanding how ducts affect HVAC performance, recognizing the benefits of regular duct cleaning, and knowing when to schedule cleaning, you can ensure your home remains comfortable and energy-efficient. Elevated Comfort is here to provide expert duct cleaning services to homeowners in California, helping you achieve optimal HVAC performance and improved indoor air quality. Contact Elevated Comfort today to schedule a duct cleaning and take the first step toward a cleaner, more efficient home.